Crane Remote Control Not Working: 6 Steps to Check Before Calling Service
When a wireless crane remote control stops responding, the cause can usually be identified within minutes by checking four areas in sequence: power supply, receiver unit, emergency stop status, and frequency pairing. In most cases, the fault is resolved on site without any component replacement. This guide walks through six sequential checks — applicable to both wired pendant and wireless RF crane remote systems — with the correct order, the time each check takes, and the resolution rate our service team observes for each step.
Get in Touch for All Your Requirements
Quick Reference: Six Steps, Time Required and Resolution Rate
The table below shows all six steps in order, the time each requires, whether any tools are needed, and the estimated fault resolution rate from our field service data. Apply them in the sequence shown — the order matters because each step rules out a cause before the next is checked.
| Step | Time Required | Tool Needed | Resolution Rate |
|---|---|---|---|
| 1. Power / Battery | 2–3 minutes | Spare battery | ~30% |
| 2. E-Stop / Security Lock | 1 minute | None | ~25% |
| 3. Receiver Unit | 5–10 minutes | Screwdriver | ~20% |
| 4. Frequency / Pairing | 5–15 minutes | Manual | ~15% |
| 5. Hardware / Firmware | 15–30 minutes | Multimeter | ~7% |
| 6. Authorised Service | Service process | Service team | 100% |
Step 1: Check the Power Supply
Power supply is always the first check — before any other diagnostic step. In wireless systems, a depleted or failing battery is the most common cause of complete non-response and can be resolved in seconds without any tools. Furthermore, the check costs nothing and rules out the single most frequent cause before anything else is opened or adjusted.
Wireless Systems: Battery and Contact Check
- Replace with a known-good battery: Remove the battery and fit a confirmed charged replacement. Test the remote immediately. If the system responds, the original battery was the cause. If it does not, proceed to the next check rather than stopping here.
- Measure battery voltage: If using a rechargeable battery, measure the voltage with a multimeter before assuming it is charged. A battery at 20% below its nominal voltage will passivate the transmitter even though the charge indicator may show a misleadingly high reading.
- Clean the battery contacts: Inspect the battery compartment contacts for corrosion, dirt, or physical deformation. A contaminated contact interrupts power before the signal is transmitted. Wiping the contact surface with a dry cloth — before fitting a new battery — can resolve the fault without any battery replacement being necessary.
Wired Systems: Cable Visual Inspection
For wired pendant systems, inspect the cable from the pendant housing to the crane panel entry point. Pay specific attention to where the cable passes through guide rollers, strain reliefs, and entry glands — these are the points where crushing and bending fatigue most commonly break the internal conductors. A cable that looks intact externally may have a complete internal conductor break at one of these points.
Step 2: Check the Emergency Stop and Security Locks
If the remote control is completely silent — no response to any button — the E-stop status is the second check. This is also the fastest check on the list. Per IEC 60204-1, all industrial crane remote controls must be equipped with an emergency stop — and a latched E-stop completely prevents all other button functions from transmitting. Consequently, an accidentally activated E-stop produces complete non-response that appears identical to a hardware failure.
E-Stop Release
The red mushroom-head emergency stop button latches mechanically when pressed. To release it, rotate the button clockwise or pull it outward — the specific release action depends on the button design. After release, the button should spring back to its fully raised position and a confirming click should be felt. If the button does not spring back cleanly, the latching mechanism may be partially engaged — rotate further in the release direction and retest.
Key Lock and Software Lock
- Key lock (power key): Some models require a physical key to be turned to the active position before any function operates. Check that the key is inserted and turned to the operating position — a key in the locked position produces the same complete non-response as an activated E-stop.
- Software lock (soft lock): Certain models enter a locked state when a specific button combination is pressed accidentally. The unlock sequence is model-specific — refer to the technical manual’s lock/unlock section. Do not attempt multiple random button combinations to unlock, as some models interpret these as re-triggering the lock.
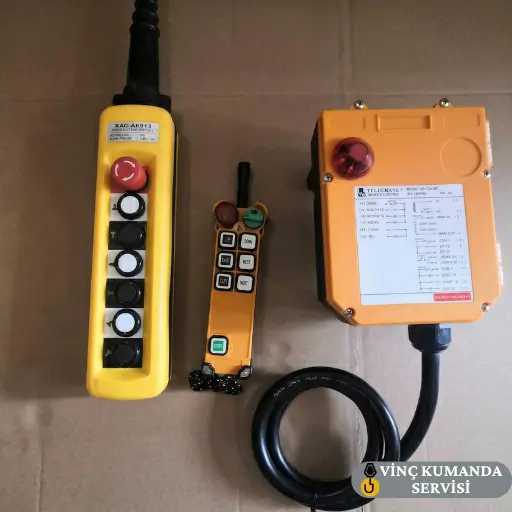
Step 3: Check the Receiver Unit and Signal Connection
If the transmitter is generating a signal but the crane is not moving, the fault may be in the receiver unit rather than the remote control. The receiver is a small electronic module mounted on the crane body — and vibration, moisture ingress, or a loose cable connection can render it non-functional independently of anything wrong with the transmitter.
Receiver Power LED Check
Most receiver units have separate LEDs for power status and signal reception. Start by checking the power LED — if it is not illuminated, the receiver is not receiving its supply voltage. Consequently, the fault is in the crane panel power supply to the receiver, not in the receiver itself. Check the supply cable from the crane panel to the receiver and verify the supply voltage at the receiver input terminals with a multimeter.
Cable Connection Tightening
Check all cable connections between the receiver and the crane panel. In industrial environments, vibration from crane travel, hoist cycling, and external machinery causes progressive terminal loosening. Specifically, check the receiver’s output relay terminal connections to the contactor coil circuit — a loose connection here produces a “signal received but crane does not move” symptom that is identical to a receiver fault.
Distance and Obstruction Test
For wireless systems, move closer to the receiver and retest. Steel columns and thick concrete walls attenuate 433 MHz RF signals significantly — a system that appears to have failed may simply have an obstruction or distance issue that was not previously present. Furthermore, test from a clear line-of-sight position rather than from behind a structural member, to confirm whether the issue is environmental before investigating the receiver hardware. For detailed interference guidance, see our crane remote control interference guide.
Step 4: Check Frequency Channel and Transmitter-Receiver Pairing
Industrial wireless crane remote controls typically operate on 433 MHz or 868 MHz ISM bands. However, if the transmitter and receiver are not matched to the same frequency channel, the system will be completely silent — producing no error code and no partial response. Consequently, a pairing or channel mismatch looks identical to a complete hardware failure, which is why it must be checked before any component is replaced.
Re-Pairing Procedure
Put the receiver into pairing mode and keep the transmitter active during the pairing sequence. The specific procedure varies by brand and model — refer to the “pairing” section of the technical manual for the exact button sequence and timing. After pairing, test at the maximum expected operating distance to confirm the pairing is stable, not just at close range.
Channel Conflict Test and Factory Reset
- Channel conflict: If multiple wireless remotes are active on the same site, channel collision can prevent the affected system from communicating. Switch the affected system to a different channel and test — if function returns, channel conflict was the cause. Establish a site-wide channel allocation plan to prevent recurrence.
- Factory reset: If the channel configuration has become corrupted, reset the receiver to factory defaults and complete the full pairing procedure from the beginning. This restores the default channel assignment and clears any configuration state that may have been disrupted by a firmware event or power interruption during a previous pairing sequence.
Step 5: Check Hardware Condition and Firmware
If the preceding four checks have not identified the cause, the fault is likely in the transmitter’s internal hardware or firmware. At this stage, partial functionality is an important diagnostic indicator — if some buttons work and others do not, the fault is almost certainly hardware-based. However, if the unit is completely non-functional despite confirmed power supply and correct pairing, firmware corruption is a likely cause.
Physical Damage Inspection
- Housing cracks and moisture ingress: Inspect the housing for cracks, dents, or discoloration that might indicate an impact event or moisture ingress. Specifically, remotes without IP67 certification that have been exposed to water in wash-down or outdoor environments frequently show this internal damage — and the damage may not be visible externally until the unit is opened.
- Button contact check: If a specific motion axis is non-functional while others work, the button for that axis may be mechanically stuck or have a contaminated contact surface. Press the non-functioning button firmly several times in succession to dislodge any contamination, then retest. If the button is physically stuck in the pressed or released position, it requires service-level repair.
Firmware Check
Some crane remote control models use manufacturer-updatable firmware. If the unit’s firmware version is significantly behind the current release, an update may resolve command mapping errors or communication protocol inconsistencies that produce unexplained non-response. Contact the manufacturer’s technical support to obtain the current firmware version and the update procedure for the specific model. Do not attempt firmware updates using unofficial sources — an interrupted or incorrect update can render the unit non-recoverable without factory intervention.
For a deeper understanding of the diagnostic instruments used at this step, see our crane remote control fault diagnosis equipment guide.
Step 6: When to Call Authorised Service
If all five preceding steps have been completed without resolving the fault, the problem is a PCB fault, receiver module failure, or firmware corruption that cannot be diagnosed or repaired without specialist test equipment. At this point, attempting further on-site intervention risks making the fault more complex — and in most cases, voids the warranty. Consequently, the correct action is to contact the authorised service team with a clear description of the fault symptoms and the steps already taken.
What to Provide When Contacting Service
- Brand name and model number of both the transmitter and receiver unit.
- Description of the fault symptom — complete non-response, partial function, incorrect command, or intermittent failure.
- The steps already completed from this guide and the result of each — this avoids repeating checks that have already been confirmed.
- Any recent events that may be relevant — receiver replacement, exposure to water, drop or impact, or a firmware update preceding the fault.
For professional diagnosis and repair, see our crane remote control repair and technical service page.
Conclusion: Apply the Steps in Order
Applying these checks in the correct sequence — power supply first, E-stop second, receiver third, frequency pairing fourth, hardware and firmware fifth — resolves the majority of crane remote control non-response faults on site without specialist tools or service. The order matters: each step confirms or eliminates a fault category before the next is investigated, preventing incorrect diagnosis and unnecessary component replacement. When the five on-site steps do not resolve the fault, authorised service with the correct diagnostic equipment is the right next action — not further on-site intervention.
Frequently Asked Questions
What should I check first when a crane remote control stops responding to any button?
Check the battery and the E-stop button — in that order. Replace the battery with a confirmed charged one and clean the battery terminal contacts. Then check that the red mushroom-head E-stop button is fully released and not latched in the pressed position. These two checks together resolve more than half of all complete non-response cases, take under five minutes combined, and require no tools.
What does it mean when the crane remote indicator lights up but the crane does not move?
The transmitter is generating a signal but the receiver is either not receiving it or not acting on it. Check the receiver unit’s power LED — if it is not illuminated, the crane panel supply to the receiver is interrupted. If the receiver power LED is on but the crane does not respond, check the cable connections between the receiver output and the crane’s contactor circuit, and verify that the transmitter and receiver are correctly paired on the same frequency channel.
How do I perform frequency pairing on a crane remote control?
Press and hold the “Learn” or “Pair” button on the receiver to enter pairing mode, then apply the button combination specified in the manual on the transmitter. The exact sequence is model-specific — do not attempt a generic sequence, as incorrect pairing attempts on some models can trigger a temporary lockout that delays the successful pairing. Always refer to the pairing section of the technical manual for the exact procedure.
Does repairing a crane remote control yourself void the warranty?
Yes — unauthorised intervention at the PCB, receiver module, or firmware level voids most manufacturers’ warranty conditions. Battery replacement and external cleaning are operator-level tasks that do not affect warranty validity. However, opening the housing for any other reason typically voids both the warranty and the IP ingress protection rating, because the factory seal cannot be reliably re-set without specialist equipment. Contact the authorised service team for anything beyond the operator-level steps.
What should I do if a crane remote control has been exposed to water?
Immediately power off the unit and remove the battery. Place the remote in a dry, warm environment — around 25°C — for at least 24 hours before retesting. Do not use external heat sources such as hair dryers — rapid or uneven heating can damage electronic components more severely than the water ingress. If the unit is not IP67 certified, there is a significant risk of internal PCB damage from the water exposure even after drying — have the unit inspected by the service team before returning it to service.
Why does the crane remote work after battery replacement but fail again within a few hours?
This specific pattern — brief recovery after battery change followed by recurrence — indicates battery terminal oxidation rather than battery capacity failure. Inserting a new battery temporarily disrupts the oxidation layer through mechanical contact pressure, restoring conductivity briefly. However, as oxidation rebuilds on the terminal surface, contact resistance increases again and the fault returns. Clean the battery terminal contacts with fine sandpaper once — this resolves the fault permanently without requiring repeated battery replacement.
Is it safe to continue using a crane remote control that works intermittently?
No. Intermittent operation creates two specific risks. First, an intermittent command signal causes crane contactors to cycle more frequently than their design specifies — accelerating contact wear and potentially triggering thermal overload protection unexpectedly. Second, the operator cannot rely on the remote to respond when an emergency stop command is issued, which is a direct safety risk whenever a load is suspended. An intermittently functioning crane remote must be taken out of service and diagnosed before further crane operation.
Contact Vinç Kumanda Servisi
Completed all five on-site steps and the crane remote control still does not respond? Contact Vinç Kumanda Servisi via WhatsApp at +90 532 546 84 62, email us at info@vinckumandaservisi.com, or visit our contact page — our team can evaluate the fault remotely before scheduling a service visit.